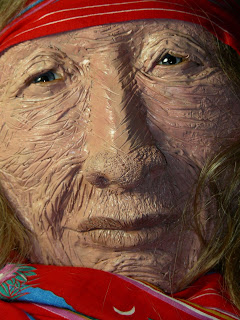
This was an experiment in sculpting with polymer clay over
papier-
machẻ. I wondered how successful layering and sculpting would be. After blowing up a small balloon, then covering it with newspaper dipped in water & white glue, I let it dry for a couple of days. I repeated this process 3 times. I popped the balloon and started sculpting with some very old polymer clay over the
papier-
machẻ.
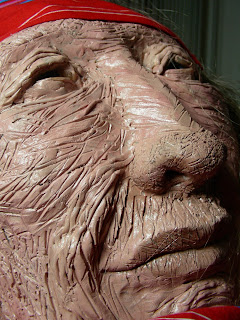
I never want to waste or throw out polymer clay if I think there is a remote chance of using it, so I had nothing to lose by giving this a try. I sculpted and built up the facial features layer by layer, baking each layer (according to the manufacturer’s recommendation). The eyes are glass and I used some acrylic paint to accent and age his skin. Because I used a lot of old clay, I decided to exaggerate the facial wrinkles, color and texture in case there was any discoloring or cracking later. But more so, he was a weathered, worn, "been through hell and back" character, so the exaggerated wrinkles defined him.

I placed a wig with a headband on him and thought, "Now what?" Now I had to get to work on how I was going to put together a body to go with this enormous head. I made the body out of PVC piping, polyester batting and old clothes. I sunk the PVC piping into boots that I had poured Plaster of Paris into and let it set. He stood almost 7’ tall.
I displayed my sculpture at an art show to draw people into my booth. Although I was not prepared for the amount of curious people. I had placed very large basket of my lower-priced beaded necklaces in his arms and draped several around his neck. I did a lot of talking about polymer clay and its many uses and sold a couple of necklaces, but I was shocked at the number of people who had not heard of polymer clay and they were just so fascinated.
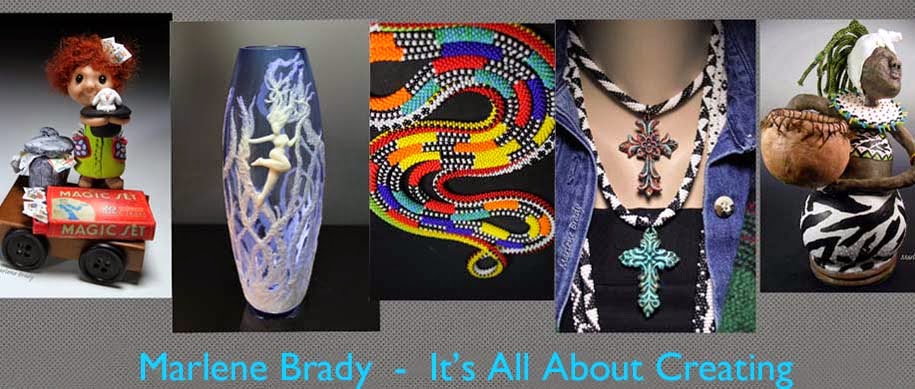
 This vase is the largest I have attempted. It is 9" wide x 14" tall. I made a leaf cane and a petal cane in various sizes and used an acrylic roller to apply them. I wanted it seamless, so I took an inordinate amount of time to manually smooth each area.
 I cured it at 260 degrees for about an hour. After curing and cooling, I put on my magnifier and checked for bubbles and/or cracks and luckily, there were none. Very happy with the curing, color combinations and smooth texture.
 This vase was an attempt to visually vary the canes and their placement on each side of a square vase to create interest. It's different, but I need symmetry. I've hung on to it because I love the colors, but am happy with the exercise.
 I read jewelry artist, Kelly Russell's blog, Beadfuddled, where she talks about doing workshops for herself, challenging her creativity. She had a piece of jewelry she was using as an inspiration piece, but she did not want to "copy" it, but to create something completely different from it. The piece she created was an upside down interpretation that was stunning. Not quite related to vases, but to pushing the envelope. Pushing creativity; starting one thing and letting it take over, following its lead. Getting wonderfully lost in the process. Heaven in a nutshell.


