



 The Bracelet Group's bracelets. Each of us incorporated the crystals from the Paris flea market into our bracelets in different ways. I served desserts and drinks and we each did show & tell for our bracelets.
 It was really special and I was so glad to be a part of it.
 Whatever I could think of to decorate with beads, I did. Beads everywhere.
 I used up some vintage beads on the napkin rings. The 2" memory wire is perfect for napkin rings and little girl's bracelets.
 I made two wreaths for our front doors with the vintage beads....and yes, I still have some left.
 Bead soup, like chicken soup, is good for your soul. What else are you going to do with all those spilled beads?
 These soaps from Anthropology smell sooooo good, but needed some beads of course!
.jpg) Went shopping to IKEA to pick up a pot rack for our kitchen and snapped a couple of photos of their "winter" table setting.
Went shopping to IKEA to pick up a pot rack for our kitchen and snapped a couple of photos of their "winter" table setting.
.jpg) So pretty. And no skeletons....how refreshing.
So pretty. And no skeletons....how refreshing.

.jpg) This thing was huge. Gorgeous. And if all that wasn't enough, it changed colors from turquoise to pink to aqua to purple to blue. Wow.
This thing was huge. Gorgeous. And if all that wasn't enough, it changed colors from turquoise to pink to aqua to purple to blue. Wow.  I finished painting the candelabra black. Love it.

.jpg) I convinced myself I needed some polymer skull napkin rings to complete my Halloween tablescape. I made the skull and cross bones from Kato polymer clay. I bought a silicone skeleton ice tray from IKEA . I cut one off, cut the depth in half and used it for the skull mold. I hand sculpted the cross bones, baked them, made a mold of them and then attached each of the cross bones to the skulls with more polymer and completed the baking.
I convinced myself I needed some polymer skull napkin rings to complete my Halloween tablescape. I made the skull and cross bones from Kato polymer clay. I bought a silicone skeleton ice tray from IKEA . I cut one off, cut the depth in half and used it for the skull mold. I hand sculpted the cross bones, baked them, made a mold of them and then attached each of the cross bones to the skulls with more polymer and completed the baking.
.jpg) I painted some second hand wooden napkin rings black, sanded and distressed them, then attached the baked polymer to the wooden napkin ring with Apoxie Clay. It binds the polymer to the wood like cement.
I painted some second hand wooden napkin rings black, sanded and distressed them, then attached the baked polymer to the wooden napkin ring with Apoxie Clay. It binds the polymer to the wood like cement.
.jpg) I also use it to alter my creatures. It has a comfortable working time an air dries to a cement finish.
I also use it to alter my creatures. It has a comfortable working time an air dries to a cement finish.
_edited-1.jpg) These are the second hand napkin rings, the ice cube tray mold and the mold I made of my polymer cross bones.
These are the second hand napkin rings, the ice cube tray mold and the mold I made of my polymer cross bones..jpg)
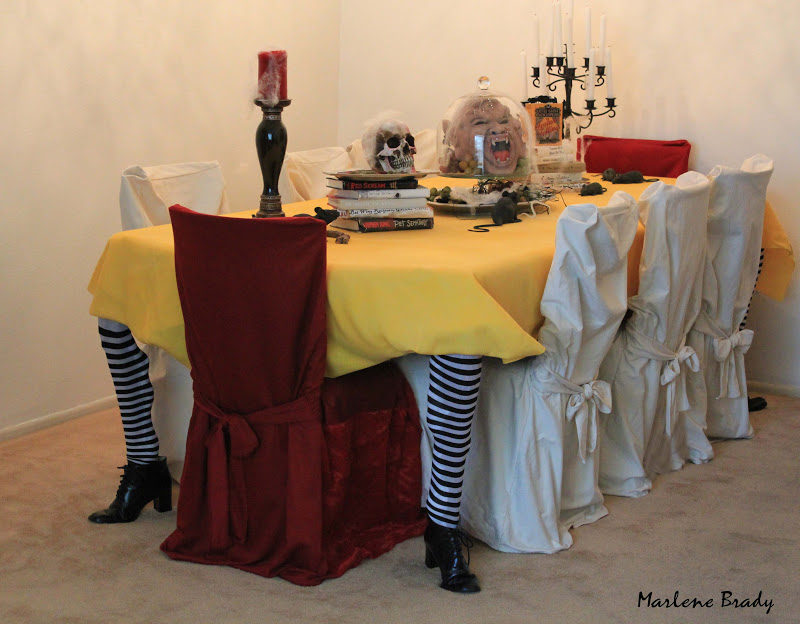
.jpg) Covered some books with plain paper and added some spooky titles.
Covered some books with plain paper and added some spooky titles.
.jpg) And, of course, what is Halloween without the classics.
And, of course, what is Halloween without the classics.
.JPG) I want to spray paint this B00ootiful candelabra black, but still haven't gotten around to it. But what a great way to start off the Halloween season.
I want to spray paint this B00ootiful candelabra black, but still haven't gotten around to it. But what a great way to start off the Halloween season. Here in the Southwest, there are the occasional bee and/or fly that invites itself to picnics or bar-b-ques. Every so often we see a bottle catcher baited with something sweet to draw the bees and/or flies in.
 When I was a kid, I used to catch fire flies and put them in a jar to watch them glow (yes, I let them go). It was always so much fun. I wanted a picnic bee catcher for my tablescape and made it out of polymer, acrylic paints, glue, wire, a piece of artificial fern and a Mason jar.
 The artificial fern was purchased. I glued the bees on with Krazy glue.
.jpg) I sculpted a small bee and then made a two-part silicone mold of it. I used Kato polymer clay in black to make duplicate bees. I painted the yellow stripes with acrylic paint and the wings with interference acrylic paint. I used a Mason jar, poked holes in the painted lid and wired a handle. Bees, flies, ants, gnats and mosquitoes........ahhhhhhhh, summer is here.
I sculpted a small bee and then made a two-part silicone mold of it. I used Kato polymer clay in black to make duplicate bees. I painted the yellow stripes with acrylic paint and the wings with interference acrylic paint. I used a Mason jar, poked holes in the painted lid and wired a handle. Bees, flies, ants, gnats and mosquitoes........ahhhhhhhh, summer is here. .jpg) Polymer picnic ants! I was inspired by RAZ Imports' tablecloth weights (the large, shiny, wrought iron ants).
Polymer picnic ants! I was inspired by RAZ Imports' tablecloth weights (the large, shiny, wrought iron ants).
.jpg) They keep the tablecloth from flying away and they're adorable. I wanted to vary the sizes and also to see if I could make one or two from polymer. They turned out great.
They keep the tablecloth from flying away and they're adorable. I wanted to vary the sizes and also to see if I could make one or two from polymer. They turned out great.
.jpg) To make an ant, I rolled 4 balls, strung them on a wire, attached them to each other by smoothing the joins, inserted the antenna and baked them. Then I took the lino cutter and carved 3 channels for the 3 wires on the ant's underside.
To make an ant, I rolled 4 balls, strung them on a wire, attached them to each other by smoothing the joins, inserted the antenna and baked them. Then I took the lino cutter and carved 3 channels for the 3 wires on the ant's underside.
 After cutting the 3 lengths of wire for the legs, I filed the ends to remove the sharp edges. Glued the wires onto the polymer, let dry, then applied liquid clay and secured the wires with a circle of polymer. Smoothed everything and then baked again. I carefully bent the wires into the leg shapes I wanted and then painted the wires.
.jpg) Beautifully dressed tables are a never ending source of color inspiration for me.
Beautifully dressed tables are a never ending source of color inspiration for me.
.jpg) I love the playful use of color, materials, light and structural form.
I love the playful use of color, materials, light and structural form.
.jpg) The skillful use of natural textures and color enhance the poetic effect of this tablescape. A rusted metal nest placecard holder, burlap covered pots, molded glass bird napkin rings, woven placemats, scented candles, spotted eggs and baby blue napkins paired with a simple china plate with a twig design. Wow.
The skillful use of natural textures and color enhance the poetic effect of this tablescape. A rusted metal nest placecard holder, burlap covered pots, molded glass bird napkin rings, woven placemats, scented candles, spotted eggs and baby blue napkins paired with a simple china plate with a twig design. Wow. I made the canes, etc. and then created several of these wall corsages, which surprisingly sold.
 I kept this one for myself as I loved the colors and organic feel to it.

 Inspiring.


