

 It's soothing; repetitive design. I created this brooch using ProSculpt Polymer Clay.
 It's soothing; repetitive design. I created this brooch using ProSculpt Polymer Clay.
 The above pendant was made by cutting a circle out of polymer clay. Applying the circle to the inside of the lid and applying enough pressure to get an impression of the inside of the red cap (below).
 I cut a larger circle from black polymer clay for the pendant's backing and bail. After it baked and cooled, I embellished it with paint and beads. Why bother with molds and textures from a plastic bottle when there are beautiful textures and molds on the market? Just to show that you don't have to spend money on expensive molds or textures to produce a one of a kind piece.
 I cut the bottoms off of a plastic juice bottle and a plastic water bottle and used the inside as molds for the below two pins.

 Tomorrow I will finish up the Bottle series with using the inside of the red plastic lid (in first photo above) for a mold.
 So far we have used the outside bottom of the bottle (click HERE) and the outside top (lid) of the bottle to create molds (click HERE). Today, we are using the side of the bottle.

 I used the side of the bottle to create the pattern in these two pins.

 This has been an interesting experiment to see how many ways I can use a bottle to produce a mold or pattern in polymer. Not done yet. I will have more on Tuesday and one on Wednesday to complete the Bottle series.
 I keep my molds, cutters, textures organized. I'm pretty good about it. So when this snowman cookie cutter showed up in my Halloween group, I was surprised to say the least. Oh, what the heck, I'll get a head start on the holidays while I'm working on Halloween. But, it kept bothering me; how the heck did I get them mixed up? Then, it hit me.......turn it around!
 That's no snowman; it's s a skull!
 The hubby came in to see what I was laughing at. He mumbled something about yesterday's post and where's that extra brain when you need it. Ha, ha, very funny.
 Meet "A. B. Normal", a little brain food for my gruesome Halloween table. I used a Jello Mold and Makins Air Dry POLYMER Clay.
 The resulting impression was excellent; good definition and extremely lightweight.
 I sealed it with a high gloss finish to give it a "moist" appearance.
 This was really a lot of fun. In the process of doing this, I went through all my air dry polymer clays and finished using all of it on different projects which I will post later. I even used the REALLY old dried up hard packages. Happy October my friends!
 Twin Witches. What do you say when you see twin witches? Which witch is which? hehe. My dining room table is transitioning for Halloween. Thanks to treasure hunting at Good Will, I was fortunate to find 2 pairs of "witchy-type" shoes for all four dining table legs. Good Will now has an entire section of new Halloween costumes and decorations, so I was able to purchase the stockings there also.
 Most stores carry the striped witch tights, but the stockings or thigh-highs fit the table legs much better, so I was happy to find them at Good Will. Details, details.
 Witch Legs aren't pretty you know, so they needed a bit of ugling-up.
 Above was my inspiration. I saw this on Bubblegum and Duct Tape (click HERE) and knew I had to have it. They actually cut or drilled a hole through the heel of the shoe so the square leg would sit evenly on the floor. My dining table legs curve out and narrow at the bottom and sat flat in the shoe on the floor so I chose not to cut a hole. Tomorrow, some bathroom decorating. I have found some fun Halloween decorating sites....just click on the "Free Tutorials" on my sidebar and click on the Halloween board.
 Meet Miss Scarrot N. Run. I sculpted her in polymer clay and painted her in acrylics. I added the pretty bows and her growing "roots".
 I thought she was pretty scary.
 But with a fun side to her too. Oh yeah, she's ready to partay! She'll most likely be stewed by the end of the night! Did you just groan?
 Remember the molds I made from the bottom of plastic bottles (click HERE)? Well, why not the lids? The little cakes in the back row are finished, but I am still working on the rest.
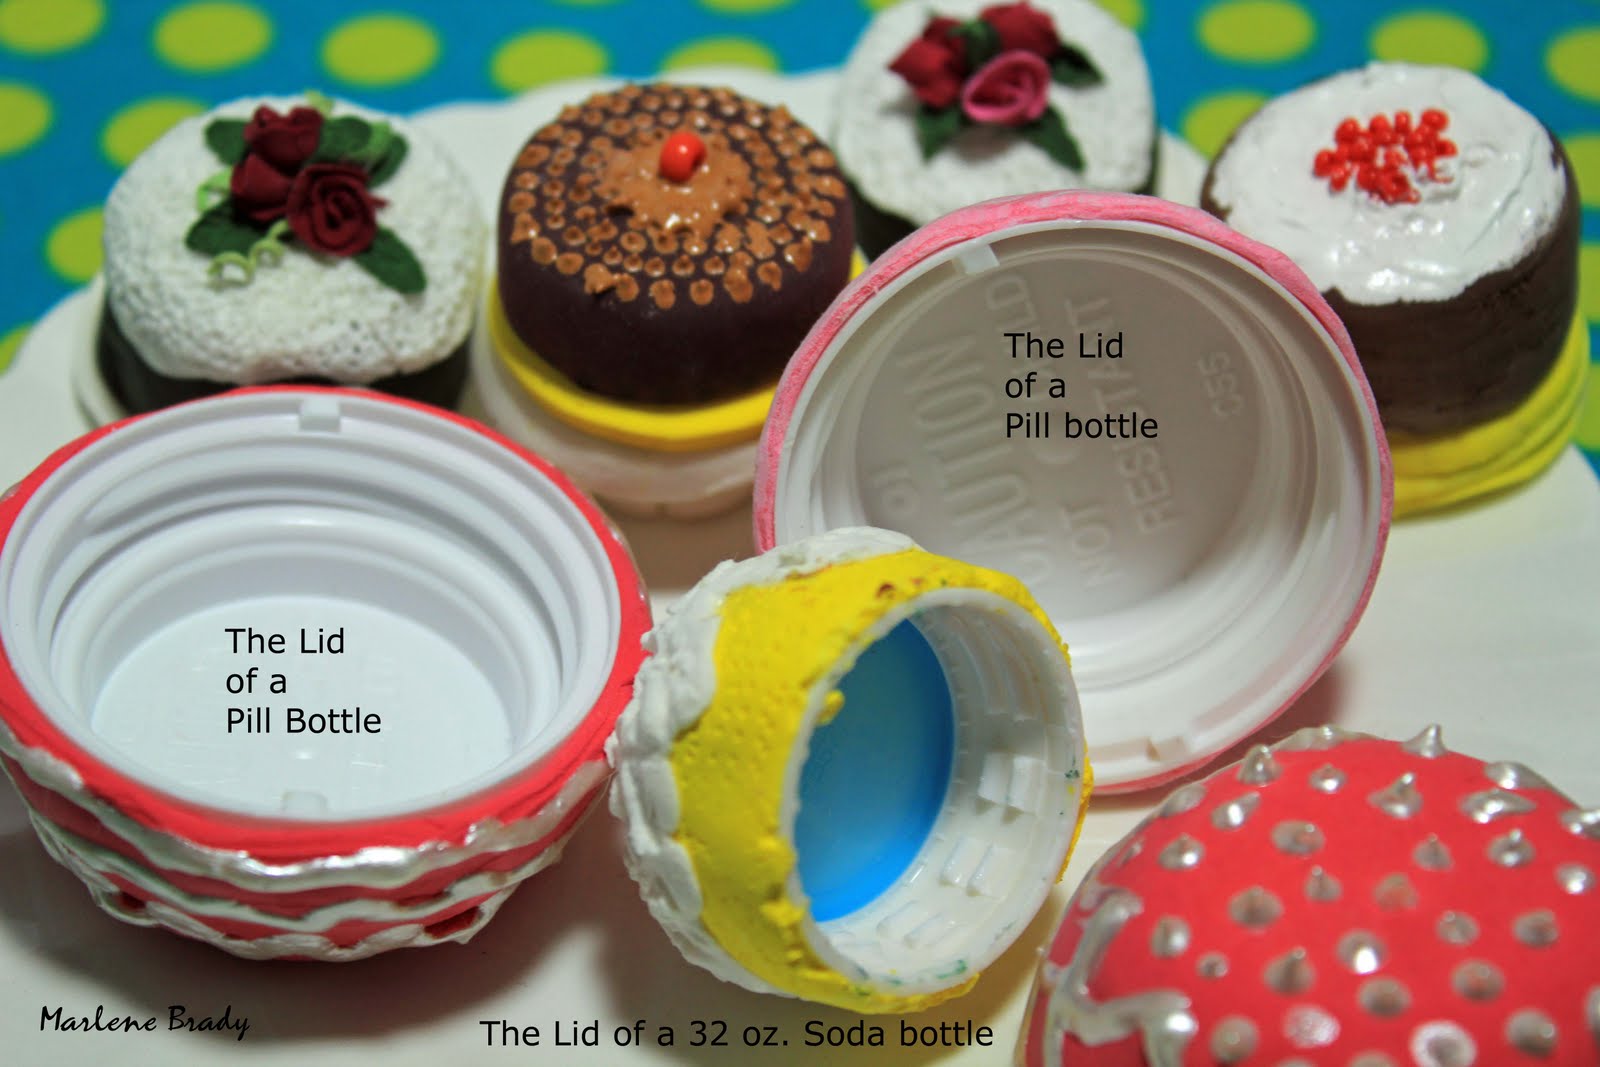 This is air dry polymer clay applied over various plastic lids. When fully hardened, I decorated some with hand sculpted air dry polymer clay roses and leaves and some with dimensional paint.

 I remembered that I had done a demonstration on various brands of air dry polymer clay and dug these out. OK, two more areas (maybe 3) of a plastic bottle to experiment with. The hubby keeps walking by me, shaking his head, saying, "Stop already".


 Above shows the detail of the using peyote stitch to build small walls giving it a 3-D effect.
 This one is finally done. I'm happy with it. I usually have one or two of these beaded free form pieces going and when I'm in the mood, I can pick one up and not worry about where I left off in a pattern. I have one that I started 3 years ago and am still working on. I do like structured pieces, but abstract, free form art just makes my heart sing.

